Let me start off by saying that all the information I got was from this website: http://www.jeepforum.com/forum/f13/coolant-sensor-bad-finally-fixed-175207/, so all credit goes to them. I am just adding pictures along with the directions for those of you who are like me and need something visual to work with.
For reference, I have fixed both my 94 and 95 Jeep Grand Cherokees with this method. I would imagine it would work for all 93-97 Grand Cherokees with the VIC.
Total time for repairs took me about a half hour for each VIC. You should not have much problem doing this on a lazy afternoon if you know your way around a soldering iron.
Remember kids, read all the instructions BEFORE you start to make sure you understand what you are doing. If you are unclear on any instructions, stop and find someone who can help you. I AM NOT RESPONSIBLE IF YOU SCREW UP YOUR JEEP! YOU ASSUME ALL RESPONSIBILITY FOR YOUR REPAIRS!
What you need:
Phillips screw driver with either a P1 or P2 bit.
Soldering iron
Solder
Solder sucker/desoldering braid (just in case)
Xacto knife
A lazy afternoon
Step 1:
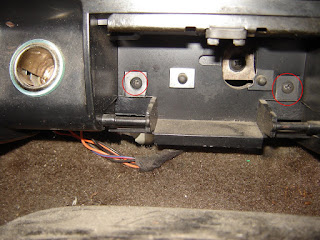
Remove the bezel. There are 6 screws holding on the bezel (2 are hidden behind the ash tray). Remove them and carefully peel it back from the bottom. There are a few cables attached to the bottom of it, so be careful as you pull it away from the console. Optional: remove the cables from the bezel. Not necessary, but it does make it a little more convenient.
Step 2:
Using your handy screwdriver, remove the screws and gently remove the VIC. I had my jeep in first gear for this. You can keep it in park, but you will have to fight with the shifter if you do.
Step 3:
Unplug the cables on back and take it to your workstation.
Step 4:
Preheat the soldering iron while you gently caress the VIC open. The tabs are a little tricky, so be careful not to break them (like I did). If you do break them, a little bit of gorilla tape will fix it good as new ;)
Step 5:
Gently flip over the top PCB and locate the connector. There should be about 20 pins. Both of my VICs had a weird, rubbery coating on the entire PCB. This is where the xacto knife comes in handy. GENTLY use the blade to cut away the rubber coating on the pins you are going to solder (I did them all, just for good measure. The broken ones were the 2 inside-most ones--they are circled).
Step 6:
With your now hot soldering iron, apply solder while you heat each pin. Make sure to touch the solder, not the rubber coating, otherwise it will be very difficult to resolder. Be careful not to overheat the pins, or they may melt the plastic housing and get pushed off kilter. If you accidentally bridge 2 solder points, you used way too much solder, but dont worry. Pull out your trusty solder sucker or desoldering braid and remove the extra.
Step 7:
After you resolder the pins, put it back together and reinstall it in your jeep.
Step 8:
Enjoy the VIC not bothering you about a non-existent problem.
Note: you can use a 3.3ohm resistor to test your VIC. just pick up a 1/2W resistor at your local electronics shop (cost me about a quarter) and plug it into the sensor plug. This will simulate a full tank of coolant. If it still says your coolant sensor is bad, you should definitely follow the above steps. If it stops saying that its bad, you probably need a new coolant sensor (about $20 at your local auto parts store), but you should still do the above steps as preventative maintenance.
Also note: I some how deleted the original pics of the process as I was doing it, so I had to go back and retake them after I fixed it. That's why all the solder points are redone already.
Friday, October 2, 2009
Subscribe to:
Posts (Atom)


